 .home page .back Tutorials. IFR
| Important! To Read! those tutorials about the night VFR and IFR ratings, and about flying the airliners are not as accurate and reliable than those dedicated to the VFR flights. It's because we really practised the VFR flights, as we didn't ever qualify for the night VFR and the IFR ratings nor any commercial license! Our tutorials about such flights are based on our VFR experience only, and augmented with data and readings taken from the Internet! People who would like to find in those the same level of accuracy and details than in our VFR tutorials, should better turn to further websites or source. People who are just looking for a honest level of realism might be satisfied already with the level of our tutorials about the night VFR, IFR flights, and the ones aboard an airliner |
note: the pecular format of this page is due to that it contains specifically formatted checklists. Your browser, thus, is unable to display this page in the same format than the other pages of this site
The IFR rating allows the pilots to fly by using the plane's flight instruments only. The IFR rating, thus, allows to fly when the clouds ceiling forbids any visibility of the ground, for example. The IFR rating -due to the training required and to the capabilities needed to train for it- is an important step forwards in the career of a pilot
The training for the IFR rating needs the following: as the pilot is already holding his PPL and the night VFR rating, he will, first, train to get the retractable landing gear-pitch controllable propeller rating (a training of 3 hours for the theory, and 5 hours of flight). Then, the most serious aspect of the IFR rating (private pilot) proper will begin, with 47 hours of theoretical lessons, 30 hours of flight in a simulator, and 50 hours of real flight (the twin engine included as we chose to joint the IFR, and twin engine rating in this tutorial). In some countries, on the other hand, as an example, they ask that you already have 125 hours of flight as a pilot in command (of which the hours you'll may have flown aboard a retractable landing gear-pitch controllable propeller plane will be allowed included). And, of those 125 hours, 50 hours will have to be have performed through navigation flights which will have unfolded on distances superior to 50 nautical miles
|
. Introduction . The Theory for the Retractable Landing Gear-Pitch Controllable Propeller Plane . Flying Aboard a Retractable Landing Gear-Pitch Controllable Propeller Plane . Emergency Procedures |
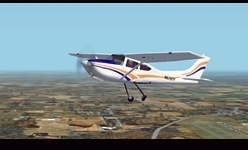
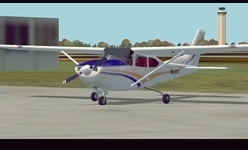
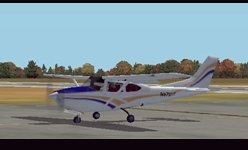
The retractable landing gear-pitch controllable propeller rating will allow to the pilots to get access to advanced GA planes, training for more complicated mechanisms of controlling a plane. The Cessna 182RG Skylane is the ideal plane for such a training, for example, as the Mooney Bravo may also be fitting albeit powerfull enough. The GA advanced planes are planes with improved performance, with a horsepower of more than 200 HP, and with features like a retractable landing gear (allowing for a more dynamical aerodynamism), the controllable-pitch propeller, or the fuel injection engine which both allow for a finer management of the flight dynamics. A plane with such improved performance need a more advanced maintenance, leading to a somewhat lessened trustfullness of the plane. Improved performance needs to the pilot to display more swift responses. A GA advanced plane, generally, needs swiftness and streamlining in the pilotage. A pilot who would pass the retractable landing gear-pitch controllable propeller rating per se -and not to go further into the IFR rating- one would have to say that such a pilot would really master that new type of plane after 50 hours of real flight only. Such a duration -albeit possibly, in some cases, with some time in less- may be considered appropriate too for any kind of new plane for which one gets a rating. In the real life, the retractable landing gear-pitch controllable propeller rating needs a theoretical training of 3 hours and 5 hours of flight. As far as the theory is concerned, the apprentice will learn those new capabilities of his planes and how they work as, in flight, he will perform the new, appropriate checklists and procedures for the rating. For that training which we are describing, we'll assume that you're correctly mastering all the fundamentals of the VFR flight (see, back, possibly, our other tutorials: basic maneuvers (level, climb, descent, flight; turns), various VFR automatisms, the various step of a flight in a GA plane (the airport traffic pattern, various procedures), the radio communications, etc.
The retractable landing gear-pitch controllable propeller planes need that one studies those new devices -and their related procedures- which are, in this order: the fuel injection system, the controllable-pitch propeller, the relationship between the use of the manifold pressure and the one of the propeller pitch, and the retractable landing gear
|
- The Injection Fuel System - The Controllable-Pitch Propeller - The Relationship Between the Use of the Manifold Pressure and the One of the Propeller Pitch - The Retractable Landing Gear |
 the commands for the propeller pitch (non-clickable illustration) |
 the landing gear retracting after takeoff (non-clickable illustration) |
As you learn and understood the new features you're going to use aboard your new advanced plane, let's pass now to the practice. You're going now to fly all the checklists for this type of plane. We'll base them on the Cessna 182RG, a plane found with FS2002. For any other plane you would use, mandatorily look for documentation on the Internet and, with a view of the panel, and the controls and commands, set up your checklists for that plane as based upon the following ones. A good start, for some good checklists, pecularily for those for the engine start or the runup, is to use some good real-life picture of the inside of your plane's cabin, or a good 3D cabin, and to examine where the controls, gauges, and commands are. A good checklist works on the basis of a logical, topographical 'circuit' (from the pilot to the lower central console, then to the right of the panel, then left, and from left to right. Using various flightsim and real world checklists you'll find on the Internet, one may thus eventually build some good checklists. Some good real-life checklists may sometimes be found on some sites of flying aero-clubs. The checklists we give are in the FS2002 format. Our checklists are given for daytime flights, as the specific actions on the lights, for a nighttime flight, are given like options
Like for the smaller GA planes, a good idea, for that training, is to save a flight by which your training plane will be set on your terrain at your favorite parking or hanger spot. Check the ' . The Steps of a Flight in a GA Plane' tutorial at 'Hanger, Parking, Preflight Check' for a reminder of the basics of that, which consists mainly into configuring your plane for parking according to the usual procedure followed by the end of a flight. Then save that flight for any future use
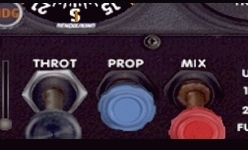
Well! You've got that new training plane. Let's now get accustomed to it. Externally, mostly no difference with an usual GA plane. Inside, let's have a view of the panel. There neither, no much difference. Apparently! Note however those: the manifold pressure gauge, the fuel flow one (above right), with at the row at the bottom, some specific commands. The 'primer': the primer is a command for the injection which allows to inject the fuel into the engine before the engine starts (the locking of it is not modelized in FS). A rudder trim. A carburetor heat. The control for the cowl flaps. The throttle for the propeller pitch which is usually. And... the landing gear lever (when the gear is retracting, usually that is pointed to by a red light lights, when the gear is retracted all lights off. When the landing gear extends, red light lighted, when it's extended, green light). The well-known command in FS, for the landing gear operation, is usually 'G'. The checklists for those advanced planes basically are similar to the ones you used for your first planes, as they are added however with all the specific commands and actions related to the new specifics on the advanced GA planes! Like for the previous GA planes, the checklists must be performed by heart. The largest of them however may be written down and/or printed and the most important be translated into mnemotechnical techniques. Thus, think about having such well readable checklists in case you choose to use them this way. For those checklists, we'll assume -like it would be the case in the real life- that you're mastering the flight aboard the simpler GA planes like the Cessna 172SP (see the tutoriel 'The Steps of a Flight in a GA Plane'). In case you would step in directly into the piloting of the advanced GA plane and that you won't catch some parts of the checklists -and flying techniques- then just use this tutoriel, 'The Steps of a Flight in a GA Plane' for more information, or the other tutorials. For people transitioning to those planes from the PPL, just remember, at last, that WE'RE KEEPING to fly VFR! Even aboard those advanced planes. You'll then have to keep using strictly the horizon-panel's top clues to place the plane into the various flight attitudes and, generally, to keep all your VFR automatisms
 pre-flight checklist about a plane with a retractable landing gear and a controllable-picth propeller (non-clickable illustration) |
A pre-flight check is used, like for the smaller planes, to check that the plane is fit to fly. You'll have to have onboard, on the other hand, the plane registration papers and the plane's handbook. Some additional explanations about the following checklist: the locking device for the nose gear are those side slipped-V-shaped bars which maintain the landing gear in an extended position. Checking for that the landing gear doors are unobstructed means that their motion must not be impeded in any way. By 'braking lines' one means the braking hydraulics lines seen at each landing gear (nose and main). The cowl flaps are varied according to the planes. To check visually the fuel level at each reservoir is a characteristic by Cessna, as the fuel reservoir are located into each wing. You'll check too that the reservoir caps are closed. Like on a smaller plane, the last operation will be to open the small door in the right, front-side main door of the engine and to check the oil level, and with, for the Cessna, some additional checks)
____________________________________
PRE-FLIGHT CHECKLIST

------
Interior Part of the Checklist
[ ] Brakes: SET-LOCKED
[ ] Magnetos: CHECKED OFF
[ ] Landing Gear: LEVER CHECKED DOWN
[ ] Eletrical Main Switch: ON OFF
[ ] Avionics Main Switch: ON OFF
[ ] Battery: ON (the following actions to be performed quickly to avoid weakening the battery)
[ ] Landing Gear Lights: GREEN
[ ] Landing Gear Warning Horn: TEST (the alarm is hearable)
[ ] Cowl Flaps: FULLY OPEN
[ ] Fuel Gauge: QUANTITIES ARE ENOUGH FOR THE FLIGHT
[ ] Avionics Main Switch: ON (check that one hears the air pump) THEN OFF
[ ] Visual Alarm of Low Void: CHECKED ON
[ ] Flaps: FULL FLAPS
[ ] Stall Warning: CHECKED (the alarm is hearable)
[ ] Battery: OFF
------
External Part of the Checklist (all checks visually only, except otherwise stated)
[ ] Propeller (cone, blades' angle): UNHURT
[ ] Front Wheel (visually, general appearance and tyre with a correct pressure): OK
[ ] Front Wheel Locking Device: OK
[ ] Front Wheel Door: OK, UNOBSTRUCTED
[ ] Front Wheel Brakes Circuit: NO LEAK, BRAKING LINES OK
[ ] Cowl Flaps: OPENINGS NON OBSTRUCTED
[ ] Front Left Fuselage: OK
[ ] Pitot Tube: TAKE THE CAP OFF, AND OK
[ ] Fuel Level, visually: OK
[ ] Fuel Cap: OK
[ ] Left Main Landing Gear visually, general appearance and tyre with a correct pressure): OK
[ ] Left Main Landing Gear DOOR: OK, UNOBSTRUCTED
[ ] Left Main Landing Gear Brakes Circuit: NO LEAK, BRAKING LINES OK
[ ] Landing Lights: OK
[ ] Taxi Lights: OK
[ ] Navigation Light (Wing's Tip): OK
[ ] Ailerons: OK
[ ] Flaps: OK
[ ] Rear Left Fuselage: OK (of it lugage compartment door closed and locked))
[ ] Elevator (manipulate it, up, down, by hand): OK
[ ] Rudder (manipulate it, up, down, by hand): OK
[ ] Rear Right Fuselage: OK
[ ] Antenna: OK
[ ] Flaps Right: OK
[ ] Ailerons Right: OK
[ ] Navigation Light Right: OK
[ ] Taxi Lights, Landing Lights Right: OK
[ ] Right Main Landing Gear visually, general appearance and tyre with a correct pressure): OK
[ ] Right Main Landing Gear DOOR: OK, UNOBSTRUCTED
[ ] Right Main Landing Gear Brakes Circuit: NO LEAK, BRAKING LINES OK
[ ] Fuel Level Right, visually: OK
[ ] Fuel Cap Right: OK
[ ] Front Right Fuselage: OK
[ ] Engine Doorlet: OPEN
[ ] Oil Level: CHECKED, OK
[ ] Hydraulic Fluid Level: OK
[ ] Carburetor Air Filter: OK
[ ] Alternator Belt: OK
[ ] Engine Doorlet: CLOSED-LOCKED
Now it's time to embark and to start the engine. Some explanations about the checklist below. Checking the circuit breakers for the avionics and the radio is done of the right side of the panel (such planes' circuit breakers are verified, for some, by pressure, or visually). The propeller area clear check is mandatory: no one has to be in the propeller area prior to the action on the magnetos. For the magnetos, passing from OFF to START is made with some slight stops on R and L, and a more marked one at BOTH. Then maintain the action on START to start the engine. Once the engine started, release the key, as its goes back by itself to BOTH. An annunciator panel, at last, is a panel on which alarms are displayed, warning of possible troubles with some of the plane's system. We assume that you acquired the basic notions relative to the radio communications during the various steps of a flight (see the tutorial 'The Steps of a Flight in a GA Plane') and all what's navigating aboard a GA plane (see the tutorial 'To Navigate Aboard a GA Plane'). note: if you chose to set a training Cessna into a saved flight, don't forget to re-activate, through the menu, the fuel tanks -this, by the way, allowing thuse to simulate a real-life command
____________________________________
ENGINE START CHECKLIST

[ ] Pilot's Seatbelt: FASTENED
[ ] Briefing the Passengers (if any), their seatbelts fastened: DONE
[ ] Pilot's Side Door: CLOSED-LOCKED
[ ] Pilot's Seat: TUNED-LOCKED
[ ] Pilot's Seatbelt: CHECKED FASTENED
[ ] Passengers' side Door(s): CLOSED-LOCKED
[ ] Passengers' (if any) Seats: TUNED-LOCKED
[ ] Passengers (if any)' Seatbelts: CHECKED FASTENED
[ ] Brakes: SET-LOCKED
[ ] Tanks switch: ON (push; it's a throttle similar to the one of gas; action may be simulated through the menu, at 'Fuel')
[ ] Fuel Selector: BOTH ON ON
[ ] Elevator Trim: NEUTRAL
[ ] Rudder Trim: NEUTRAL
[ ] Cowl Flaps: FULL OPENED
[ ] Flaps: 10
[ ] Avionics Circuit Breakers: OK
[ ] Radios Circuit Breakers: OK
[ ] Landing Gear: LEVER DOWN
[ ] Autopilot: OFF
[ ] Battery: OFF
[ ] Mixture: FULL RICH
[ ] Propeller Pitch: FULL FORWARDS (the highest)
[ ] Primer: ACTION 2 TO 6 TIMES (don't use when the engine is warm)
[ ] Carburetor Heat: OFF
[ ] Pitot Heat: ON
[ ] Beacon: ON
[ ] Strobe: ON
[ ] Fuel Pump: OFF
[ ] Gas: THE THROTTLE SLIGHTLY FORWARDS
[ ] Battery: ON
[ ] Propeller Area: CHECKED CLEAR
[ ] Magnetos: START
[ ] Alernator: ON
[ ] Fuel Pump: OFF
[ ] Gas: THE THROTTLE STILL FORWARDS TO GET SOME RPM (albeit not too much,  not to 'push' onto the brakes)
[ ] Alternator: CHECKED CHARGING
[ ] Oil Temperature: OK
[ ] Navigation Lights (in case of a night flight): ON
[ ] Altimeter: SET
[ ] Heading Indicator: TUNED RELATIVE TO THE MAGNETIC COMPASS
[ ] Avionics Main Switch: ON
[ ] Radios: TUNED
[ ] Radionav Aids (if any): TUNED
[ ] Autopilot (if any): TUNED
[ ] Onboard Computer (if any): TUNED
[ ] Annunciator: TESTED
[ ] Radioing (for taxiing): DONE
[ ] Transponder Code (if any): DISPLAYED
Now, we're ready to taxi to the active runway. Don't forget to check, while taxiing, the turn indicator and coordinator, the heading indicator, and the brakes. Any stop, on another hand, along the taxiways, brings necessarily to you pull-lock the brakes, and slightly advance the gas throttle (enough for some rpm; not too much, not to 'push' on the brakes; think about how you were feeling that push on smaller planes). The specificity of an advanced GA plane resides in that you have to lean the mixture (some mixture throttle back) each time you're taxiing (don't set it back however each time you stop while taxiing)
____________________________________
TAXI CHECKLIST

[ ] Taxi Lights (in case of a night flight): ON
[ ] Mixture: SLIGHTLY LEANED
[ ] Parking Brakes: UNLOCKED
[ ] apply the throttles and taxi
[ ] Turn Indicator: CHECKED WORKING
[ ] Heading Indicator: CHECKED WORKING
[ ] Parking Brakes: CHECKED WORKING
As we have now neared the runway, we're going, like for a smaller GA plane, to configure our plane for takeoff and/or check that she's ready to do so. Some additional explanations for the checklist below: the controllable-pitch propeller is an addition to the checklist you already now for the smaller planes (the test of it is grouped with the magnetos test), as the carburetor heat is checked too along. In the real world Cessna 182RG, there is, at the point where the gas throttle is penetrating into the plane, a throttle friction screw which allows for controlling the friction there (ascertaining more certainly that the gas applied are remaining at their value during the operations of flight). And, like on a smaller GA plane, you'll check too the three flight main controls (the ailerons, the elevator, and the rudder) are entirely free and unimpeded
____________________________________
BEFORE TAKEOFF CHECKLIST

[ ] Pilot's side Door: CLOSED-LOCKED
[ ] Pilot's Seat: TUNED-LOCKED
[ ] Pilot's Seatbelt: CHECKED FASTENED
[ ] Passengers' side Door(s): CLOSED-LOCKED
[ ] Passengers (if any)' Seats: TUNED-LOCKED
[ ] Passengers (if any)' Seats' Backs : IN THEIR UPMOST POSITION
[ ] Passengers (if any)' Seatbelts: CHECKED FASTENED
[ ] Windows: ALL CLOSED
[ ] Brakes: SET-LOCKED
[ ] Tanks switch: ON
[ ] Fuel Selector: BOTH ON ON
[ ] Elevator Trim: SET FOR TAKEOFF
[ ] Rudder Trim: NEUTRAL (or set for takeoff)
[ ] Cowl Flaps: FULL OPENED
[ ] Flaps: 10
[ ] Landing Gear: LEVER DOWN (green)
[ ] Primer: ON-LOCKED
[ ] Mixture: FULL RICH
[ ] Gas Throttle: SLIGHTLY FORWARDS
[ ] Propeller: FULL FORWARDS (highest pitch)
[ ] Carburetor Heat: OFF
[ ] Pitot Heat: ON
[ ] Beacon: ON
[ ] Strobe: ON
[ ] Navigation Lights (in case of a night flight): ON
[ ] Taxi Lights (in case of a night flight): ON
[ ] Landing Lights: ON
[ ] Fuel Pump: ON
[ ] Battery: ON
[ ] Alternator: ON
[ ] Testing the Magnetos, Propeller Pitch, and Carburetor Heat (all ops performed with the gas advanced to 1,700 rpm)
-magnetos: from BOTH to L (rpm loss), back to BOTH (rpm back); from BOTH to R (rpm loss), back to BOTH (rpm back)
-propeller pitch cycle: from full forwards to full backwards and back, with a loss of rpm
-carburetor heat: ON, a rpm loss and back to OFF
[ ] Testing Full Throttle Out: THROTTLE FULL OUT, the engine doesn't stop
[ ] Gas Throttle: BACK TO SLIGHTLY FORWARDS
[ ] Gas Throttle Friction Screw: TUNED
[ ] Fuel: QUANTITIES OK
[ ] Alternator: CHECKED CHARGING
[ ] Oil Temperature: OK
[ ] Air Void Gauge (VAC): OK
[ ] Airspeed Indicator: OK (at 0 kts)
[ ] Attitude Indicator: OK
[ ] Altimeter: SET
[ ] Turn Indicator-Coordinator: OK
[ ] Heading Indicator: CHECKED TUNED RELATIVE TO THE MAGNETIC COMPASS
[ ] Vertical Speed Indicator: OK (at 0)
[ ] Annunciator: CHECKED NO ALARM
[ ] Radios: CHECKED SET
[ ] Radionav Aids (if any): CHECKED SET
[ ] Autopilot (if any): SET
[ ] Onboard Computer (if any): SET
[ ] Transponder Code (if any): DISPLAYED
[ ] All Flight Controls' Work: WORKING AND UNIMPEDED
[ ] Briefing the Passengers (if any): DONE
[ ] Radioing, no other plane in final: DONE
Taking off aboard those GA advanced planes is a little bit more complicated than in the smaller planes you're used to. You'll apply full throttles as you may possibly redure, as soon as now, the propeller pitch (propeller throttle somewhat backwards) to get 2,400 rpm. AND you'll begin pulling progressively the yoke back at about 50 kts. The nose will raise. And the plane will take off! A slight level flight (pushing some yoke forwards to let the plane accelerate). Once the airspeed increasing, one takes the climb pitch (through the visual clue horizon-panel's top). AND, FIRST MAIN DIFFERENCE! We are, now, having a landing gear hereunder! Once the takeoff ascertained DON'T forget to retract it! Technically, as the plane's wheels are still rolling from the takeoff roll, just apply some brakes hits, to stop them, and then only, landing gear lever up, red light while gear retracting, hearing that the motion unfolds without any trouble; no more lights when the landing gear is fully retracted, with the landing gear doors closed!). Then, when you're reaching 70 kts, climbing, the flaps OFF. The powerful engine of the plane brings us to a speed of 80 kts at the climb pitch. At 500 ft/AGL the fuel pump OFF. ANOTHER DIFFERENCE: we have, now, cowl flaps too. They are to keep being opened during all that phase of flight. Once the takeoff proper over, as the landing gear and flaps have been retracted, you perform the climb checklist. All the climb operations keep being made at a climb rate of 700 ft/mn at the Vertical Speed Indicator. According to our cruise altitude to reach, one will have, beginning at 3,000 ft, to control the mixture leaning, to adjust it to the altitude
____________________________________
CLIMB CHECKLIST

[ ] 500 ft AGL: FUEL PUMP: OFF or CHECKED OFF
[ ] Cowl Flaps: FULL OPENED
[ ] Flaps: NO FLAPS ANYMORE AT 70 KTS
[ ] Rudder Trim (if used at takeoff): NEUTRAL
[ ] Landing Gear: CHECKED RETRACTED (no light)
[ ] Mixture: CHECKED FULL RICH
[ ] Gas Throttle: FULL THROTTLE
[ ] Propeller Pitch: TO GET 2,400 RPM
[ ] Oil Pressure: OK
[ ] Oil Temperature: OK
[ ] Pitot Heat: KEEPING BEING ON
[ ] Navigation Lights (in case of a night flight): CHECKED ON
[ ] Landing Lights: CHECKED ON
[ ] Beacon, Strobe: CHECKED ON
Once we'll have reached our cruise altitude and the plane will have been placed into a level flight (clue horizon-panel's top) and let accelerating, we're going to configure the plane for that level flight. This mainly means to apply one of the sets of relationship manifold pressure-propeller pitch-mixture, searching either for some fuel efficient, or speed efficient regime. Like we saw it in the theoretical part of your training, the advanced pilots knows that the best mixture regime, in cruise, is set 'by hear', as they are retarding the mixture throttle until the engine stops, and then they just throttle the mixture back, of just enough to get the engine back. There's the best mixture regime for the cruise mode flight! You'll note that no combination of gas, prop pitch and mixture may excede 80 percent of the maximum rpm allowed for your plane (red line at the r.p.m. indicator)
____________________________________
CRUISE CHECKLIST
(once the plane put into a level flight, and let accelerated)

[ ] Pitot Heat: OFF
[ ] Strobe: OFF
[ ] Manifold Pressure: BETWEEN 15 AND 23
[ ] Mixture: OPTIMUM (by hear), OR AT WILL
[ ] Propeller Pitch: TO GET BETWEEN 2000 AND 2400 RPM
[ ] Cowl Flaps: CLOSED
[ ] Navigation Lights: (in case of a night flight): ON
[ ] Alternateur: CHECKED CHARGING
[ ] Oil Temperature: OK
[ ] Oil Pressure: OK
[ ] Autopilot (if any): SET
[ ] Onboard Computer (if any): SET
As we'll have ended the cruising part of our flight, we'll have to worry that we are now nearing our airport of destination and we have to fly the 'approach' there, those procedures of flight making us transition from the cruise to the airport environment. Except for all those approach and radio procedures proper, that phase of the flight, as far as the settings of our advanced GA plane are concerned, will consist of getting back to simplier engine settings, allowing us to concentrate on the flight. Further, when we'll have reached the appropriate point of our approach (the downwind, or in another way), we'll have to configure the plane for landing, with some specific checklist at that point. THE MAIN THING, now, is to well REMEMBER THAT WE HAVE A LANDING GEAR! It's the first main fault which may fall upon the pilot passing from the GA to the advanced GA planes! It's really possible that, by inadvertance, you could end by landing on the belly and, with a good landing, not even to notice it! It would be just once the plane immobilized on the runway that you would notice you're resting on the fuselage, with no way anymore to move the plane by taxiing! THUS! LANDING GEAR! And follow its complete motion by hearing that in the background of your operations! As far as the descent is concerned, less manifold pressure and the propeller pitch remaining at the cruise value are the good settigns. The mixture will have to be set according to the altitude. Once gotten flying into the airport traffic pattern -or the equivalent- one will be able to pass to controlling the airspeed through the gas throttle only, as the propeller will be set full forwards (highest pitch) and the mixture generally will be full riche. The speed in the traffic pattern of an advanced GA plane is similar to the one of a smaller plane: about 80 kts that is
____________________________________
APPROACH CHECKLIST

. Approche Proper:
[ ] Radioing (approach, or the terrain, etc.): DONE
[ ] Altimeter: SET
[ ] Autopilot (if any): TUNED
[ ] Onboard Computer (if any): TUNED
[ ] Transponder Code (if any): DISPLAYED
[ ] Pilot's Seat: TUNED-LOCKED
[ ] Pilot's Seatbelt: CHECKED FASTENED
[ ] Passengers (if any)' Seats: TUNED-LOCKED
[ ] Passengers (if any)' Seats' Backs : IN THEIR UPMOST POSITION
[ ] Passengers (if any)' Seatbelts: CHECKED FASTENED
[ ] Briefing the Passengers (if any): DONE
[ ] Tanks switch: ON
[ ] Fuel Selector: BOTH ON ON
[ ] Cowl Flaps: CLOSED
[ ] Engine Settings (gas, propeller, mixture): OK
[ ] Carburetor Heat: ON
[ ] Strobe: ON
[ ] Navigation Lights (in case of a night flight): CHECKED ON

. Configuring the Plane for Landing (to modulate function of what approach you are flying):
[ ] Airspeed: 80 kts
[ ] Flaps: 10
[ ] Mixture: FULL RICH
[ ] Propeller: FULL FORWARDS
[ ] Landing Gear: EXTENDED (green)
[ ] Brakes: CHECKED UNLOCKED
[ ] Tanks switch: ON
[ ] Fuel Selector: BOTH ON ON
[ ] Cowl Flaps: CLOSED
[ ] Carburetor Heat: ON
[ ] Pitot Heat: ON
[ ] Beacon: ON
[ ] Strobe: ON
[ ] Navigation Lights (in case of a night flight): CHECKED ON
[ ] Landing Lights: ON
[ ] Fuel Pump: ON
[ ] Heading Indicator: TUNED RELATIVE TO THE MAGNETIC COMPASS
[ ] Alternator: CHECKED CHARGING
[ ] Pilot's and Passengers (if any)' Seatbelts: CHECKED FASTENED
[ ] Autopilot (if any): TUNED or OFF
[ ] Onboard Computer (if any): OFF or TUNED
[ ] Radioing: LIKE NECESSITATED
[ ] Flaps: 2 NOTCHES
The airspeed of an advanced GA plane, for the final, is barely above the one of a smaller plane, about 65-75 kts (it's set through the manifold pressure only and checked there only). Like for any other plane, all the flaps are set at the beginning of the final. At last, a supplementary cautious action is taken for our plane. As it has a landing gear, we're checking, after we'll have extended the flaps, that the gear is still extended (green light in the Cessna 182 RG). The final and landing are performed like on a GA plane: descending to the runway threshold, flare, etc. There too, the plane is touching first with the main landing gear, and the front wheel is lowered after only
____________________________________
FINAL AND LANDING CHECKLIST

[ ] Flaps: FULL FLAPS
[ ] Landing Gear: CHECKED EXTENDED (green)
[ ] Radioing
[ ] Briefing the Passengers (if any)
 runway clear! (non-clickable illustration) |
Nothing but usual there, with, as soon as the speed on the ground allows to control the plane, she's steered to the next taxiway (chosen by use, or instructed by the tower). Once the runway cleared, one configures the plane runway cleared and for taxi
____________________________________
RUNWAY CLEARED CHECKLIST

[ ] Cowling Flaps: FULLY OPEN
[ ] Flaps: RETRACTING ALL
[ ] Elevator Trim: SET TO NEUTRAL
[ ] Brakes: PULLED-LOCKED
[ ] Mixture: FULL RICH
[ ] Gas Throttle: SLIGHTLY FORWARDS
[ ] Propeller Pitch: FULL FORWARDS
[ ] Carburetor Heat: OFF
[ ] Pitot Heat: OFF
[ ] Strobe: ON
[ ] Beacon: ON
[ ] Navigation Lights (in case of a night flight): ON
[ ] Taxi Lights (in case of a night flight): ON
[ ] Landing Lights: OFF
[ ] Fuel Pump: OFF
[ ] Transponder (if any): SET TO 1200
[ ] Radioing (radio call on the terrain's frequency, or contacting the appropriate control)
[ ] Briefing the Passengers (if any): THEY MUST KEEP their seatbelts fastened until the plane is immobilized
[ ] Mixture: SLIGHTLY LEANED before taxiing
We're heading to the GA parking now. Once the plane set on its parking assignation, we'll cut the engine off and configure the plane for parking. The engine cutoff procedure is the same than the one for the smaller planes
____________________________________
ENGINE CUTOFF AND PARKING CONFIGURATION CHECKLIST

[ ] Pilot's side Door: UNLOCKED
[ ] Pilot's Seatbelt: KEEPING IT FASTENED
[ ] Passengers' side Door(s): UNLOCKED
[ ] Passengers (if any)' Seats' Backs : AT PASSENGERS WILL
[ ] Passengers (if any)' Seatbelts: passengers are allowed to unfasten their seatbelts
[ ] Brakes: SET-LOCKED
[ ] Tanks switch: ON
[ ] Fuel Selector: BOTH ON ON
[ ] Elevator Trim: NEUTRAL
[ ] Rudder Trim: NEUTRAL
[ ] Cowl Flaps: CLOSED
[ ] Flaps: ALL RETRACTED
[ ] Landing Gear: LEVER DOWN (green)
[ ] Gas Throttle: SLIGHTLY FORWARDS
[ ] Mixture: FULL RICH
[ ] Propeller Pitch: FULL FORWARDS
[ ] Carburetor Heat: OFF
[ ] Radioing: LEAVING THE FREQUENCY
[ ] Radios: CUTTING THEM OFF
[ ] Autopilot (if any): OFF
[ ] Onboard Computer (if any): OFF
[ ] Avionics Main Switch: OFF
[ ] Taxi Lights (in case of a night flight): OFF
[ ] Throttles: FULL OUT
[ ] Mixture: FULL LEAN
[ ] Alternator: OFF
[ ] Battery: OFF
[ ] Magnetos: KEY FROM BOTH to OFF
[ ] Navigation Lights (in case of a night flight): OFF
[ ] Beacon: OFF
[ ] Strobe: OFF
[ ] Fuel Selector: BOTH ON OFF
[ ] Tanks switch: OFF (one may set 'Deactivated' through the menu)

supplementary actions to be performed outside the plane (that's not a checklist anymore, strictly): wheels' stops, fixing cables, anti-theft device, etc.)
This procedure, for an advanced GA plane, needs further explanations due to the specificity of our new plane. In case of a go-around: apply back full throtles, carburetor heat OFF, the flaps immediately retracted to the takeoff value. Let the plane accelerate, in a level flight, to reach the takeoff speed of 55 kts AND take then the climb pitch. Once a positive climb rate ascertained, one retracts the landing gear (hearing the motion). Thence, the gear is checked retracte (no light). Flaps all retracted then, and opening fully the cowl flaps
____________________________________
REJECTED LANDING CHECKLIST

[ ] Gas throttle: FULL FORWARDS
[ ] Carburetor Heat: OFF
[ ] Flaps: SET for takeoff
[ ] Airspeed: 55 kts
[ ] Once a positive climb rate ascertained: LANDING GEAR RETRACT
[ ] Landing Gear: CHECKED RETRACTED (no light)
[ ] Flaps: ALL RETRACTED at 70 kts
[ ] Cowl Flaps: FULL OPEN
When you're getting to a new plane rating, most of the time, you'll have to get acquainted with its specific, new emergency procedures. The GA advanced planes, further, as they are complexified planes, has to be considered like having more chance to be prone to failures and various incidents than the simplier planes. You'll have to train for the following emergency procedures at the effect you master them
Well, captain! Now you've gotten that advanced GA plane rating. Congratulations! It's your first step to the complete IFR rating. Let's go!
Website Manager: G. Guichard, site Lessons In Microsoft Flight Simulator / Leçons de vol pour les Flight Simulator de Microsoft, http://flightlessons.6te.net.htm. Page Editor: G. Guichard. last edited: 5/27/2013. contact us at ggwebsites@outlook.com