 .home page .back Tutorials. GA Planes
note: the pecular format of this page is due to that it contains specifically formatted checklists. Your browser, thus, is unable to display this page in the same format than the other pages of this site
To know how a flight aboard a GA plane is unfolding will bring more realism to your flights. Whether the GA pilot will go from one terrain to another, or that he will have some training flight in its terrain neighbourhood, such a flight will unfold according to a precise number of steps, bringing the plane from cold and dark in the hanger, back to the parking. To fly, in FS, according such steps, allows to stay to the nearest of the real life as, at the same time, it's much improving your flying skills! In the real life, any flight aboard a GA plane will begin at the hanger or the parking, where the pilot will start the engine, then keeps on on the taxiways, with the plane taxiing up to the runup position. Then the pilot will take off, climb to its cruising, or training, altitude, cruise or train, and then descent, approach and land on the terrain he wanted to reach -or on its home terrain in case of some training. This tutorial is to describe those steps of a GA flight! Each step of a flight, further, necessitates that the pilot perform certain actions unto the plane as those actions are synthetized under the form of the famed 'checklists', those lists of the actions to perform. A good idea, for a sim pilot is to search, for a given plane, such checklists on the Internet. Those allow to go far much beyond the checklists provided by Flight Simulator and to finely approach of the reality of a flight. Albeit, we'll use, for that training, the default Cessna 172SP, we'll not use its checklists, specifically but we'll instead use more general ones, largely inspired from our experience aboard a Robin DR-400. You'll just have to adjust such descriptions to the plane you're using. Note: the procedures and checklists are given for daylight, VFR flights, with the checklists however containing optional settings regarding the lights, in case of a night VFR flight. You will also note that such those basic steps of a GA flight are of interest because when acceding to higher performance plane, up to airliners, such basics will be found back, albeit with some adaptations of course! CAUTION! Checklists are given in a the FS2002 format. You will have to adapt any use for a other version). DON'T forget to make a backup of your original checklist, to be able to find it back, in case when! NOTE! The checklists a pilot performs all along the various steps of a flight, may be, in a first time, written like a liste on some paper sheet, as, after that, they have all to be memorized and performed by heart (in FS, that will be easier if you eventually choose to fly on one type of plane only). You will also note that on the French-speaking page of that tutorial, we are releasing a list of checklist suited to the Robin DR-400, which is the workhorse plane for aviation schools in France, the equivalent of the Cessna 172 in the USA, for example. We unluckily do not have at our disposal such any checklists for the Cessna 172, which will bring you to find such real-world checklists on the Internet, for example
->The Use of Smartphones With The FS Franchise
As the smartphones now get widespread, some brands are featuring applications to be used into the FS franchise (check more with a search engine on the Internet). Microsoft operating systems for smartphones however do not feature much such applications. A idea, to remedy that, is just to appropriately formalize checklists or flight plans unto a .gif or .jpg picture, for example, as you will be able to use those instead of the FS default kneeboard. Fine!
A GA pilot, before all, will prepare his flight in the pilots' lounge. With his charts, the NOTAMs or even the new, Internet and computers resource, he prepares the flight and cares about what the weather is. Even if he flies VFR, he may file a flight plan (albeit that's not mandatory). That part of a flight -preparing it- is not treated in that tutorial, as it will be the object of a tutorial of its own. A complete flight preparation occurs mainly for a navigation, as, for a training flight in the vicinity, for example, the preparation will be eased somehow, with mostly to spot where the training may occur, the weather, the NOTAMs for the region, and the data (pressure, active runway, etc.) concerning the terrain
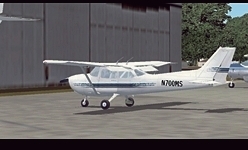
Once the flight prepared, the pilot, according to where the plane is parked, heads to the hanger, or the parking. It the plane is sheltered in a hanger, he will get she out and bring she unto a parking spot, where the following will occur. If the plane already is parked outside, the procedures may immediately begin. A much fine -and much profitable- idea, in FS2002, is to configure a plane in a parking, cold and dark position, and to save it. Each time you'll want to start a GA flight from that terrrain, you'll just have to call that flight and just update the date, time, and weather. How to do that? Just call a Cessna 172SP in FS and get it unto the terrain of your choice. From the position you'll have chosen in FS, just possibly move the plane, with the 'Y' key -when available- from where the plane is to the parking lot of your preference (you can position the plane under a hanger; we'll see that after; in that case, just configure the plane first, outside). FS, so, gave you a Cessna with its engine running. Well, set the plane with those settings: flaps: no flaps, trim: neutral, brakes: pulled-locked (or check that it's set so), rpm: 1,000 rpm. Now, just cut off the engine: possibly take off the fuel pump and the pitot heat; cut off the avionics master switch (the large, white switch); possibly switch off any lights (not the strobe/beacon now); now throttle full out AND mixture full lean, progressively. The engine coughs and stops! Alternator: OFF, battery: OFF, strobe/beacon: OFF, fuel selector: OFF; magnetos: the key from START to OFF (in the real life, you would take off the key from the keyhole). Here you are! The plane is now configured cold and dark. You may position she wherever you want (with a 'Y' key, for example) and, then, just save the flight (with a name easy to remember, like: 'My plane on my home terrain' or something like that. CAUTION! In any case THINK OF not saving the flight like the default, except should you use that flight like the one you will mostly use! That way of doing in any case will allow to avoid parking-configuring your plane for each training session). As far as the hanger is concerned, it might however that the FS default hangers don't much allow to park a plane, with she crashing when the flight is called, or the plane being found on the roof of the hanger, for example). Well, in any case, now, when you want to start a flight, you'll found yourself in a situation which is much more real-life like than when FS itself configure your plane for a first use. Should the plane be allowed by FS (in case, for example, of a freeware add-on) in a hanger, just procede to the operations to get from there, place it on a parking spot, pull-lock the brakes, and begin the procedures. In the real world, pilotes just push the plane out to the operation spot with the help of aide, or, more recently using a kind of pusher of sort as adapted to GA planes. If your usual parking spot is outside, your plane is ready for the action already
 pre-flight checklist (non-clickable illustration) |
Now, what the pilot is going to do is to perform the 'preflight check'. Like the name, the preflight check aims at being sure that the plane, as checked from the outside, is fit to fly. You will use a appropriate view mode. Before beginning, you'll have made sure that all what is needed for your flight is onboard (charts, route sheet, possible embarked computer, etc.). A pilot begins the preflight check by opening the cabin's door. Just open the battery (ON), swiftly check the fuel quantities, and get one notch of flaps. Just cut off immediately cut off the battery (OFF) not to discharge it. And the pilot now is keeping on the preflight check, from the outside of the plane: he begins by checking the status of the propeller's cone and the propeller blades' angles, checking that the surfaces are unhurt. Then the front wheel (general appearance, the tyre is, visually, at a correct pressure). You'll then continue the preflight check by the left side of the plane, to end it at the front right of it. To avoid, starting there, a too long description of the checks to perform, we'll give them under the form of the first checklist of the plane. In the case of the preflight checklist, we'll explain, under it, the terms which are not self-understanding
____________________________________
PREFLIGHT CHECKLIST

[ ] Battery: ON
[ ] Fuel: QUANTITIES ARE ENOUGH FOR THE FLIGHT
[ ] Flaps: 1 NOTCH
[ ] Battery: OFF
[ ] Propeller (cone, blades' angle): UNHURT
[ ] Front Wheel (visually, general appearance and tyre with a correct pressure): OK
[ ] Left Main Landing Gear (idem): OK
[ ] Pitot Intake: NON OBSTRUCTED
[ ] Left Wing Angle of Attack: VISUALLY OK
[ ] Wing's end Lights (nav and strobe): VISUALLY OK
[ ] Ailerons: : VISUALLY OK
[ ] Flaps: VISUALLY OK
[ ] Antenna: VISUALLY OK
[ ] Static Air Intake: NON OBSTRUCTED
[ ] Elevator (manipulate it, up, down, by hand): OK
[ ] Rudder (manipulate it from left to right, by hand): OK
[ ] Rear Antenna: VISUALLY OK
[ ] Luggage Door: CLOSED-LOCKED
[ ] Flaps (right): VISUALLY OK
[ ] Ailerons (right): VISUALLY OK
[ ] Right Wing's end Lights (Nav and Strobe): VISUALLY OK
[ ] Right Wing Angle of Attack: VISUALLY OK
[ ] Right Main Landing Gear (visually, general appearance and tyre with a correct pressure): OK
[ ] Oil Level: OK; CLOSE THE DOOR BACK
The preflight check, now, is over: you deemed that your plane is ready to fly. Accessorily, just remember that you'll have to have onboard too various official documents, like the plane's registration, airworthiness certificate, etc
(explanation of some terms of the checklist):
. the pitot intake is, for example on the Cessna 172SP, the air intake at a right angle, under the left wing; it serves to feed with air the airspeed indicator
. the static air intake: allows the ambient air to feed the altimeter system. On some planes like a Robin DR-400 it is found under the form of a button-sized, circular metal intake with a hole in its center and located on the side of the fuselage between the flight deck and the tail
. elevator and rudder: just really make them work by hand, to check if they work at their best angle
. the luggage door is variously located on the different types of planes
. oil level: once back to the engine, at the front right of your plane, you'll have to open a little door in the engine's main door and to check the oil level
. note: in case of a night VFR flight, the preflight check is made with the help of a torch
Well. Second step, now! It's time to embark! Yourself, and your possible passengers. Should you take passengers onboard, it's time, once they are seated in the plane, and yourself, to brief them about what's to happen ('Well, your captain speaking :-), we're soon going to begin our flight to... We'll have ... (time) of flight. We're now going to start the engine and then we'll taxi to the active runway for a take off'). You explain to them too how they fasten their seatbelts, where they aerators are, they possible personal lights too and any convenience (among others, some paper bags in case of airsickness LOL). You yourself fasten your own seatbelt and you tune your seat (relative to the rudders)
The engine start now, with, further, the settings of the flight instruments, radios, the possible radionav aids, autopilot, onboard computer, etc. Engine start: this is the second checklist of your flight. To be easy to remember, just always follow the same circuit inside the plane (function of what the real-life checklists tell and the location of the switches and commands); an easy way, for example, is to start at the pilot's door and to end at the magnetos, after having passed through the flaps, trim, etc. and the panel. Just adjust a personal checklist by taking in account what you'll have found in real-world checklists and the ability to easily memorize the circuit! Another hint: flightsim pilots usually are slow; just act somewhat faster! In the real life, flying necessitates fluent actions (except some hard-loaded checklists) which bring to a result. For that second checklist, we are starting the engine, and setting the flight instruments and radios! Let's go! First, the pilot's door: it's closed and locked. Your seatbelt is checked fastened. The passengers side doors are closed and locked as the possible passengers have their seatbelts fastened. Then you follow on, from the flaps: one notch of flaps, trim is neutral, the fuel selector is on BOTH, the parking brake is pulled and locked, the mixture is full rich, the pitot heat is ON. The beacon/strobe ON (the beacon -in case of the Cessna 172SP, FS2002 doesn't dissociate the beacon from the strobe- is turned on to make that the other pilots and people see your plane; the beacon, strictly, means that the pilot is onboard). The fuel pump: ON (it will help starting the engine). The throttles: slight forwards (if you didn't use the plane since a while, just push-pull it about 3-4 times and then slightly forwards). Then the battery: ON (it's going to give the energy to the start) as, with the magnetos we're going to trigger the sparks which are going to start the engine! At that moment, the obligation for the pilot is to check that the propeller area is cleared and that starting the engine won't hurt anybody. AND YOU get the key into the magnetos' keyhole (that's not simulated in FS) and trigger the magnetos, passing from OFF to BOTH, through R and L -with a slight stop between each and a more marked one at BOTH), AND you switch to START and keep the key there. AND the engine starts! As the key came back by itself on BOTH. AND you now keep on the starting procedure: the alternator: ON (it's now going to charge the battery, powering the plane during the flight), fuel pump: OFF (it's no more useful now), and the rpm at 1,000 rpm. Check on the amperemeter that the alternator is charging and that on the oil gauge that the oil temperature is OK. Two fundamental flight instruments now: the altimeter and the heading indicator! Let's set the small, right window in the altimeter to the value of the pressure at the terrain and its surroundings, using the knob at the lower left (the altimeter is working like a barometer, with the atmospheric pressure; setting the regional pressure -or QNH- at the altimeter brings the altitude of the terrain to be displayed; at the opposite, should you ignore the regional pressure, just display the terrain's altitude at the altimeter, and you get the QNH in the window! The pressure is in inches of mercury in the anglo-saxon world, and in hecto-pascals in Europe, for example). The second flight instrument to be tuned at that moment is the heading indicator. You'll have to make it match the heading given by the magnetic compass. The heading indicator indeed is working on a gyroscopic basis -making it more steady than the compass, as it will shift along a flight due to that however. The magnetic compass only is to rely on to get the correct heading reading; it's unreliable however during turns, for example, hence the heading indicator. So, at the beginning of the flight, just have the heading indicator matching the reading of the compass (use the knob to the lower left) -and you'll to do that, by interval, during the flight. LET'S KEEP ON the checklist! Radios now, radionav aids, the autopilot, the onboard computer, if any of those used or there. Main avionics switch: ON (white button; that triggers the whole avionics circuit) and you call the radio stack window (in FS), where you set the frequencies you're going to use (radio1 on the terrain first frequency to use, and radio2 on the first control you'll meet once airborne, for example). Possibly tune the VOR1, VOR2, ADF should you use some (which is not mostly the case in a GA, VFR flight). Tune then the autopilot should your plane have one -and should you use it, and the possible onboard computer (as those devices are beginning to be used by VFR pilots). WELL! The engine start checklist is now mostly OVER! With the engine running, the flight instruments, radios, possible navaids tuned. Hence we're ready to taxi to the active runway. How to begin the taxi operations will depend on the terrain on which you are: on a small terrain (an aero-club, for example), it's the pilots themselves, using a common frequency at and around the terrain, who radio their intentions and maneuvers; on a larger terrain, with a tower, you'll have to communicate with them to get authorized to taxi (the tower, on such terrains, is managing the taxi, take off, landings, departures and approaches), as on the large airports, they will have a separate frequency for any ground movement and various frequencies for any move at or around the airport (tower, departures, approaches, etc.), with, in some cases, even a separate frequency to ask for permission to start the engine. So, at that moment, you'll, in any case, have to radio, like, for example: '3-5-Tango, at the parking; now taxiing to the active', or 'Wheeling Tower, 3-5-Tango, good morning!'/'3-5-Tango, Wheeling Tower, good morning!'/'Cessna Skyhawk, November-2-8-3-5-Tango, at the parking, leaving for a VFR flight to Cincinnati, request taxi clearance'; or, on a large airport: 'Denver Ground, 3-5-Tango, good morning!'/'3-5-Tango, Denver Ground, good morning!'/'Cessna Skyhawk, November-2-8-3-5-Tango, at the parking, leaving for a VFR flight to Cheyenne, request taxi clearance'. On the large terrains, the control will give you a transponder code, which will allow your plane to be identified on the radar screens of them; you'll have to display it in the appropriate display of the panel. Engine start checklist completed. You're ready now to taxi! The checklist is given too under its FS useable form (recall: like any VFR checklist, that one is to remembered by heart; it's easier when you fly aboard a same type of plane)
____________________________________
START CHECKLIST

[ ] Pilot's Seatbelt: FASTENED
[ ] Briefing the Passengers (if any), their seatbelts fastened: DONE
[ ] Pilot's side Door: CLOSED-LOCKED
[ ] Pilot's Seatbelt: CHECKED FASTENED
[ ] Passengers' side Door(s): CLOSED-LOCKED
[ ] Passengers (in any)' Seatbelts: CHECKED FASTENED
[ ] Flaps: 1 NOTCH
[ ] Trim: SET TO NEUTRAL
[ ] Fuel Selector: ALL
[ ] Parking Brakes: PULLED-LOCKED
[ ] Mixture: FULL RICH
[ ] Pitot Heat: ON
[ ] Beacon: ON
[ ] Strobe: ON (in the FS2002 Cessna Skyhawk, the beacon and strobe dissociation is not modelized)
[ ] Fuel Pump: ON
[ ] Throttles: SLIGHTLY FORWARDS (if the plane not been used since a while: 3-4 push-pulls, then SLIGHTLY FORWARDS)
[ ] Battery: ON
[ ] Propeller Area: CHECKED CLEAR
[ ] Magnetos: START
[ ] Alternator: ON
[ ] Fuel Pump: OFF
[ ] Throttles: FOR 1000 rpm
[ ] Alternator: CHECKED CHARGING
[ ] Oil Temperature: OK
[ ] Navigation Lights (in case of a night flight): ON
[ ] Altimeter: SET
[ ] Heading Indicator: TUNED RELATIVE TO THE MAGNETIC COMPASS
[ ] Avionics Main Switch: ON
[ ] Radios: TUNED
[ ] Radionav Aids (if any): TUNED
[ ] Autopilot (if any): TUNED
[ ] Onboard Computer (if any): TUNED
[ ] Radioing (for taxiing): DONE
[ ] Transponder Code (if any): DISPLAYED
Once the plane started and tuned, the radio message for taxiing done, you're now ready to taxi towards the end of the runway, using the taxiways. The taxiways are those taxiing lanes which are used to move from the parking lots to the runway, or conversely. Not a lot occur during taxiing: you just release the brakes, apply some throttles, and rolling; you'll have to taxi relatively slowly (about a little more than the pace of a walking man), to follow the centerlines (if any), monitor the other planes possibly taxiing, and possibly obey an order by the ground control to stop and let another traffic pass by. ABOVE ALL, as soon as you'll begin to taxi, you'll have to CHECK the good working of two flight instruments. To do that the opportunities of when you're turning: the turn indicator and coordinator, and the heading indicator. On the first one, the plane's silhouette will have to move; and the heading indicator will have to have the heading moving. While keeping taxiing, next just CHECK the brakes, too: as you're rolling just pull them (';') twice or thrice -just to slow the plane, and not stop she- checking that they are working. Keeping taxiing, you'll have arrived to that point before the runway which is marked on the ground by appropriate markings. It's there that you're now going to perform the next step: the 'runup' or 'before takeoff check'. Those operations, on some airports or terrains, may be given a special location for it. The runup consists into test and tune the plane for takeoff. When stopping before the runway, on the special part of the taxiways, pull-lock the brakes and have the rpm, through the throttle, at 1,000 rpm (note: generally, each time you'll stop, on the ground, remember to lock the brakes and set 1,000 rpm!)
____________________________________
TAXI CHECKLIST

[ ] Taxi Lights (in case of a night flight): ON
[ ] Parking Brakes: UNLOCKED
[ ] apply the throttles and taxi
[ ] Turn Indicator: CHECKED WORKING
[ ] Heading Indicator: CHECKED WORKING
[ ] Parking Brakes: CHECKED WORKING
The before takeoff check is to check that the plane is ready for takeoff and/or to ready she! This is a procedure which has to be performed on a steady -and even swift- pace (some other planes may be waiting to takeoff behind you!). The plane, so, is stopped at the runup point (either before the runway; or on a dedicated location); parking brakes are set and locked, as the rpm are at 1,000 rpm. According to a circuit -which will be easier to memorize- like we did for the engine start, we'll procede. We'll start from the pilot's side door too: the door is closed and locked, your seatbelt is fastened. The possible passengers have their seatbelts fastened and the passengers' side doors are closed and locked. THEN, flaps: 1 notch, trim: SET for takeoff; fuel selector: ALL; parking brakes: pulled-locked; mixture: full rich; rpm at 1,000 rpm; pitot heat is ON, beacon on ON, strobe on ON, landing lights: ON, the fuel pump: ON (the engine will need all the power available), battery is ON, alternator is ON. AS, now, we're going to test the magnetos (the magnetos are providing the sparks to the engine; it's a secured, doubled system; the test aims at checking both systems work), and the full throttle out. Here's how to perform that: the parking brakes are set, blocking the plane; just advance the throttles to obtain 1,800 rpm at the tachometer; the plane is vibrating; that's normal. AND switch the magnetos key from BOTH to L; you check (that tends to be slow in FS) that you're loosing some rpm; back to BOTH (the rpm are back); and now, from BOTH to R (anew, some loss of rpm), back to BOTH (rpm back again). AND, now, you just pull the throttles completely back, as the rpm now completely fall (to about 600 rpm); you check then that the engine keeps running and doesn't stop. And you apply the throttle back to get 1,000 rpm back. You'll note how all those operations are finely giving you a sense that the takeoff is imminent. LET'S KEEP ON with the engine gauges: the fuel quantities are enough for the flight, the alternator is charging (amperemeter), the oil temperature is OK. AND YOU FOLLOW ON with the flight instruments (from the upper lef to the bottom right): the airspeed indicator: OK (at 0 kts), the attitude indicator: OK (nothing, in fact, is to check), the altimeter (the pressure displayed is the correct one), turn indicator-coordinator (OK; nothing to check, in fact), the heading indicator: it's matching with the magnetic compass (possibly re-match it), the vertical speed indicator: OK (at 0). THEN the radios, radionavigation aids (if any), autopilot (if any and used) and onboard computer (if any and used): the frequencies are the good ones, the VOR, ADF, etc. are correctly set-tuned, the autopilot, the onboard computer are OK. AND the possible transponder code is SET. A last check, now: the flight controls; just act the yoke/wheel control fully forwards-backwards, and fully left and righ, and the same with the rudder (left, right). This check is to check that the three flight main controls (the ailerons, the elevator, and the rudder) are entirely free and unimpeded in their working. THE RUNUP CHECKLIST IS OVER NOW! Just brief your possible passengers, like: 'Well, the plane's ready to takeoff. We're going to take off on the runway 2-3; check that your seatbelts are correctly fastened; you'll note that the take off may be an impressive step of the flight'. You radio your intents (the messages will be varied according to the terrain you're taking off from; on a small, uncontrolled terrain: '3-5-Tango, ready to take off on the 2-3!' heralding the other pilots possibly on the airport pattern that a plane is now going to take off; and, on the controlled terrains, you'll ask a takeoff clearance to the tower, as they will clear you -with, possibly, the first commands for the following ('... maintain runway heading and call back at 1,000 ft' for example). Note, that, when you're communicating with an air control instance, you'll always have to acknowledge the instructions by summarizing-repeating them; example: 'Wheeling tower, 3-5-Tango, Roger; I'm cleared to take off on the 2-3, I maintain runway heading, and I call back at 1,000 ft'. AT LAST, should take off from an uncontrolled terrain, it's of your own responsability that, before radioing you're taking off, you visually -and through the common frequency- check that no plane is on the final, preparing to land. In such a case, you should delay your decision to take off. Note, on that point, that, even on a controlled terrain, you, as the commander onboard, you're ultimately the sole responsible for your own safety. That means that, even when cleared to take off by the tower, YOU HAVE to check that no plane is in final! WELL, NOW, you're ready to take off. Here is the before takeoff checklist
____________________________________
BEFORE TAKEOFF (or RUNUP) CHECKLIST

[ ] Pilot's side Door: CLOSED-LOCKED
[ ] Pilot's Seatbelt: CHECKED FASTENED
[ ] Passengers' side Door(s): CLOSED-LOCKED
[ ] Passengers (if any)'  Seatbelts: CHECKED FASTENED
[ ] Flaps: CHECKED 1 NOTCH
[ ] Trim: SET FOR TAKE OFF
[ ] Fuel Selector: CHECKED ALL
[ ] Parking Brakes: CHECKED PULLED-LOCKED
[ ] Mixture: FULL RICH
[ ] Rpm: 1,000 rpm
[ ] Pitot Heat: CHECKED ON
[ ] Beacon: CHECKED ON
[ ] Strobe: CHECKED ON (in the FS2002 Cessna Skyhawk, the beacon and strobe dissociation is not modelized)
[ ] Navigation Lights (in case of a night flight): CHECKED ON
[ ] Taxi Lights (in case of a night flight): CHECKED ON
[ ] Landing Lights: ON
[ ] Fuel Pump: ON
[ ] Battery: CHECKED ON
[ ] Alternator: CHECKED ON
[ ] Testing the Magnetos: from BOTH to L (rpm loss), back to BOTH (rpm back); from BOTH to R (rpm loss), back to BOTH (rpm back)
[ ] Throttle Full Out: THE ENGINE DOESN'T STOP
[ ] Rpm: back to 1,000 rpm
[ ] Fuel Gauge: QUANTITIES ARE ENOUGH
[ ] Alternator: CHECKED CHARGING
[ ] Oil Temperature: OK
[ ] Airspeed Indicator: OK (at 0 kts)
[ ] Attitude Indicator: OK
[ ] Altimeter: SET
[ ] Turn Indicator-Coordinator: OK
[ ] Heading Indicator: CHECKED TUNED RELATIVE TO THE MAGNETIC COMPASS
[ ] Vertical Speed Indicator: OK (at 0)
[ ] Radios: CHECKED SET
[ ] Radionav Aids (if any): CHECKED SET
[ ] Autopilot (if any): SET
[ ] Onboard Computer (if any): SET
[ ] Transponder Code (if any): DISPLAYED
[ ] All Flight Controls' Work: WORKING AND UNIMPEDED
[ ] Briefing the Passengers (if any): DONE
[ ] Radioing, no other plane in final: DONE
That part of this tutorial largely evokes the technique of the take off like describe in the tutorial 'Taking Off and Landing in a GA Plane '; thus we'll assume that you read that. THE RUNUP now is OVER, as you've been cleared to take off and/or you've ascertained that no traffic is in final. Thus you trottle some forwards, and enter the runway! To perform a take off, while beginning a flight, you have two possibilities: first, you can get unto the runway, stops and begin the take off; or you can get unto the runway, and keep rolling, following up immediately with the take off. In both cases, you'll have roll to the centerline! In the first case, once stopped, once verified your plane is aligned with the centerline, you stop a while (you may briefly make yourself a briefing like: 'I'm taking off on the runway 2-3, the take off speed is at 55 kts; level, accelerate, 70 kts, flaps out and climb') and you take off (some throttles, rolling, full throttles, etc.). In the second case, you roll to the centerline AND you keep applying, progressively, more throttle and you've begun the take off roll, and here you go! In both cases, should you take off by night (rolling to the centerline, or once stopped there) just light the taxi lights out! AND you're taking off: yoke, correct the torque to the left, accelerating, 55 kts, take off. Level, 70 kts, flaps out, and climb pitch. THERE, you perform a climb checklist: at 500 ft AGL, fuel pump OUT, there are no flaps (checked), mixture is full rich, the oil pressure is OK (the pitot heat, landing lights, beacon and strobe are still ON) AND you fly the 'departure'. The 'departure' is this first phase of the flight through which you're leaving the terrain's environment, towards your cruise altitude and heading. Mostly, that phase of the flight is done while keeping climbing. The flight, during the departure, varies according to the size of the terrain you're leaving, with the use of the airport pattern on the uncontrolled terrains (see more about the maneuvers at our tutorial 'The Standard Airport Traffic Pattern'), with a possible radio call: '3-5-Tango, I'm leaving the traffic pattern, goodbye!'. Or, on the larger, controlled terrains and airports, with a regulated airspace around them (due to that there are more planes in the environment), either you'll have to follow the instructions given by the tower controlleres, then the departures ones, who will lead you to that point where they'll allow you to your heading and altitude; either you'll have to follow a published VFR path, a altitude, heading and speed-defined flight path -thus published on some aeronautical charts- which will take you from the runway axis to one of the borders of the airport's airspace, as, from there, you'll be able to head to your heading and altitude. As far as the actions inside the plane during the departure operations are concerned, they are mostly none, except that, around the large airports, you'll possibly have to re-configure rapidly your plane for some level flight, with a determined speed (example: some throttle out, pitot, landing lights, strobe, beacon keeping ON, one notch of flaps back for a speed of about 80-90 kts; and possibly re-tune the heading indicator relative to the compass). And, of course, you'll have to maintain your plane on the published -or instructed- heading, altitudes, speeds -and with the use of possible navaids, a possible onboard computer. And, once cleared to your cruise altitude and heading (or around a small terrain, once leaving the pattern), you'll take a climb pitch back, full throttles, the flaps out back and a 700 ft/mn of climb rate. Meanwhile, you'll have too begun your navigation, watching your waypoints and landmarks. Or you'll climb, in case of just a training flight around a small terrain, to the location and altitude you chose for your training. In any case, just cut off the landing lights when back to climb. As you'll climb, you'll take off, by interval, progressively some mixture to match the carburetor's functionment and the availability of air. Let's take the opportunity here too to remember you of an important point: a VFR pilot -and a pilot generally all along his career- will always have to monitor the surroundings skies for any possible traffic! They do that by 'scanning' the surroundings at interval. THAT'S VITAL (and that might be a good training for any future US Air Force career). Generally, one looks to the front upper left and one goes to the upper right, and monitoring in-between through a peripheral vision; then one looks from behind left to ahead the side left (idem with the peripheral vision), and from behind right to ahead the right side (the same); just tune that to your preferences and understanding of that, with the essential being that the monitoring be comprehensive, hence methodical, as, at the same time it must remain 'natural', relative to your head's possibilities, and the fact that you're piloting the plane
____________________________________
CLIMB CHECKLIST
(to be used during the climb immediately following your takeoff; the other procedures -on the departure, for example- are not checklists; they are flight technique only and the adherence to published, or instructed- procedures)

[ ] 500 ft AGL: FUEL PUMP: OFF
[ ] Flaps: CHECKED NO FLAPS
[ ] Mixture: CHECKED FULL RICH
[ ] Oil Pressure: OK
[ ] Oil Temperature: OK
[ ] Pitot Heat: KEEPING BEING ON
[ ] Navigation Lights (in case of a night flight): CHECKED ON
[ ] Landing Lights: CHECKED ON
[ ] Beacon, Strobe: CHECKED ON
Once your climb over, either you'll be cruising towards the terrain of destination, or you'll have reached the location and altitude you chose for training. The fact that you reached a level flight necessitates, thus, that you configure your plane for level (see the tutorial 'Level Flight, Climbs, Descents, Turns Aboard a GA Plane'): you let the plane accelerate and tune the rpm at 2,400 rpm, you tune again the mixture (and then re-tune the rpm to 2,400) and the configuration is: pitot heat: OFF, strobe: ON, the alternator is charging, oil temperature and pressure are OK. Should you have/use a autopilot or onboard computer, you tune them. And, as far as the radio communications while cruising are concerned, you're obliged to communicate with a control only in the case when you chose to file a VFR plan (which is not mandatory, generally). The air control, along the route you'll fly may be considered like a juxtaposition of control area depending, each, on a control center. If your flight is long enough, you'll pass from one area to another. Example of communications: 'Denver Control, 3-5-Tango, good morning!' / '3-5-Tango, Denver Control, good morning; go ahead!' / 'Denver Control, Cessna Skyhawk, November-2-8-3-5-Tango, on a flight from Denver International to Cheyenne, I've filed a VFR plan, currently at 10 minute estimated southwest of Denver, and 6,500 ft' / '3-5-Tango, Denver Control; Roger, we got you. You really are under a VFR plan. QNH is 2-9-8-6' / and you acknowledge in turn: 'Denver Control, 3-5-Tango, Roger. VFR plan, and the November Hotel is 2-9-8-6'). While on such a VFR filed plan, you'll hear the other planes on the frequency. As far as a training flight is concerned, you mostly never file any VFR plan, except when you should go sufficiently far away, or in forecasted potentially dangerous conditions, hence you won't have to communicate with any control, as the configuration of the plane, before any specific training, remains the same than described just above. On a navigation flight to a terrain, on the other hand, in such countries like the USA, you'll be able to get some renewed values for the altimeter from automatized stations along the way (you'll have taken their frequencies while preparing your flight). You'll note that in some other countries, the GA planes are allowed to set the standard pressure of 29.92 at much lower altitudes than in the US, dispensating them of worrying to get the pressure along the route. Remembering of checking your altimeter's pressure along the route is FUNDAMENTAL along a route, in the first case, as the atmospheric pressure changing, with the weather, you may gain or loose some altitude of importance above the relief!
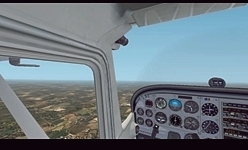 cruising (non-clickable illustration) |
____________________________________
CRUISE CHECKLIST
(once the plane put into a level flight)

[ ] Pitot Heat: OFF
[ ] Strobe: OFF (in the FS2002 Cessna Skyhawk that will too light off the beacon)
[ ] Navigation Lights: (in case of a night flight): CHECKED ON
[ ] Alternator: CHECKED CHARGING
[ ] Oil Temperature: OK
[ ] Oil Pressure: OK
[ ] Autopilot (if any): SET
[ ] Onboard Computer (if any): SET
The 'approach', in a flight, is the term used for the procedures which are to be performed once arrived to a relative proximity with the terrain where one's flying to (or, in case of a training flight, when one's coming back to a relative proximity to the terrain). That's the moment when one passes from the cruise altitude to the altitude necessitated to get into the airport standard pattern -in case of a small terrain- or into some published, or instructed, arrival procedures, in case of a larger terrain or airport (about the maneuvers of insertion into an airport pattern, see the tutorial 'The Standard Airport Traffic Pattern'). Even, on larger terrains and airports, on the other hand, a VFR published path, or the instructions of the controllers, may eventually lead to a traffic pattern. The approach, at last, in its final phase, will allow to perform most of the configuration of the plane for landing:
____________________________________
APPROACH CHECKLIST

. Approach Proper:
[ ] Radioing (approach, or the terrain, etc.): DONE
[ ] Altimeter: SET
[ ] Autopilot (if any): TUNED
[ ] Onboard Computer (if any): TUNED
[ ] Transponder Code (if any): DISPLAYED
[ ] Briefing the Passengers (if any): DONE
[ ] Strobe: ON
[ ] Navigation Lights (in case of a night flight): CHECKED ON
[ ] Carburetor Heat: CHECKED


. Configuring the Plane for Landing (to modulate function of what approach you are flying):
[ ] Speed: 80 kts, THROUGH 2,100 rpm (of full throttle back if a downwind)
[ ] Flaps: 1 NOTCH
[ ] Trim: SET
[ ] Parking Brakes: CHECKED UNLOCKED
[ ] Mixture: FULL RICH
[ ] Carburetor Heat: ON
[ ] Pitot Heat: ON
[ ] Beacon: CHECKED ON
[ ] Strobe: ON
[ ] Navigation Lights (in case of a night flight): CHECKED ON
[ ] Landing Lights: ON
[ ] Fuel Pump: ON
[ ] Heading Indicator: TUNED RELATIVE TO THE MAGNETIC COMPASS
[ ] Alternator: CHECKED CHARGING
[ ] Autopilot (if any): OFF
[ ] Onboard Computer (if any): OFF or TUNED
[ ] Radioing: LIKE NECESSITATED
[ ] Flaps: 2 NOTCHES
That we came here through a traffic pattern on a small terrain, or following a VFR path, a pattern, or the control's instructions for larger ones, we eventually are at the point of final, there where we'll begin to descent towards the runway threshold (about the technique of the final, see the tutorial 'Taking Off and Landing in a GA Plane'). Arriving there in a large airport environment, you'll possibly will have been transfered to the last control taking you in charge, the tower that is (the controller will mostly give you the last instructions of importance, if any: a new altimeter QNH, possible dangerous conditions of wind, or the controller may ask you some specifics about where you'll touchdown -on the large runways of the large airports, they may prefer to have you touchdown ahead of such or such taxiway, to avoid perturbating the flow of the airliners landing before, and after, you). As far as configuring your plane for the final is concerned, you just have to set all flaps, radio your intent in case of an uncontrolled terrain ('3-5-Tango, in final for the 2-3', or acknowledge that you're cleared to land on a larger terrain) AND you swiftly brief your possible passengers ('Well, we have begun our final to the runway 2-3; the final and landing are impressive phases of a flight too'). YOU THEN begin the final (descent pitch through the visual hint horizon/panel's top and VSI, 1,800 rpm, possible correction of the axis, slope, TAKING CARE of the risks of stall) as you conclude the final with the flare (level, throttles full out, slight pitch up. Pitch keeping up until the stall horn resounds, keeping holding, main landing gear touchdonw, keeping, and front wheel touchdown). Now braking by interval until your reach a speed allowing for the control of the plane on ground. On an uncontrolled terrain you yourself choose your exiting taxiway, as, on larger terrains, it's the controllers who will direct you to such or such one. Thus, you exit the runway (on the uncontrolled terrain, or the grass surfaces only, you evacuate the runway by estimating that the runway is sufficiently cleared from the plane's rear, for the other planes landing); on the more advanced taxiways and terrains, there are ground markings to help you check that (the plane's rear has to be beyong the markings). You apply-lock the brakes, and 1,000 rpm (you're now back to taxiway conditions) and on an uncontrolled terrain only, you call '3-5-Tango, runway is clear' signaling the other pilots they may land in turn
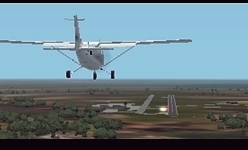 on the final (non-clickable illustration) |
____________________________________
FINAL AND LANDING CHECKLIST

[ ] Flaps: FULL FLAPS
[ ] Radioing
[ ] Briefing the Passengers (if any)
(the remaining of the final and landing is flying technique)
Well. We've now exited the runway. Let's configure our plane accordingly (mostly we're going to take out all what was used for landing): flaps all out, trim to neutral, brakes applied and locked, mixture full rich, rpm checked at 1,000 rpm. Pitot heat OFF. Strobe, beacon remaining ON. Landing lights OFF, fuel pump OFF. The transponder (if any), after landing, has to be set to 1200. You brief your possible passengers that you're now going to taxi to the parking, as they must keep their seatbelts fastened. If you're on a uncontrolled terrain, you radio: '3-5-Tango, taxiing to the parking'; if on a controlled terrain, or one with a ground control, the tower will transfer you to there: 'Cheyenne Ground, 3-5-Tango, good morning!' / '3-5-Tango, Cheyenne Ground, good morning!' / 'Cheyenne Ground, Cessna Skyhawk, November-2-8-3-5-Tango, I just landed on the 2-3. Asking for taxi clearance', as they will give you the instructions necessary to taxi to the GA parking -that you'll acknowledge. And, according to what we said about the taxiing, you taxi to the GA parking area (appropriate speed, plane's control, possibly obey to the control's orders, etc.). No instruments check occurs when taxiing to the parking after a landing. When arriving to the parking lots, you maneuver the plane appropriately to get it appropriately onto the parking stand (you may not follow the centerlines anymore). You apply and lock the brakes, and rpm at 1,000 rpm
____________________________________
RUNWAY CLEARED CHECKLIST

[ ] Flaps: RETRACTING ALL
[ ] Trim: SET TO NEUTRAL
[ ] Parking Brakes: CHECKED PULLED-LOCKED
[ ] Mixture: FULL RICH
[ ] Rpm: CHECKED 1,000 rpm
[ ] Pitot Heat: OFF
[ ] Strobe: LET ON ON
[ ] Beacon: LET ON ON
[ ] Navigation Lights (in case of a night flight): CHECKED ON
[ ] Taxi Lights (in case of a night flight): ON
[ ] Landing Lights: OFF
[ ] Fuel Pump: OFF
[ ] Transponder (if any): SET TO 1200
[ ] Radioing (radio call on the terrain's frequency, or contacting the appropriate control)
Our flight is over. We're at the parking. We now will cut off the engine and configure the plane for its stay on the parking (or the hanger). Let's take again a kind of circuit pattern to do that: the pilot's side door is unlocked (on some planes, you'll be able to get some fresh air right from now by, for example, opening the canopy), the pilot keep his seatbelt, the passengers' side doors are unlocked (passengers may unfasten their seatbelts), no flaps (on some planes, the parking configuration requires one notch), trim checked at neutral, brakes pulled and locked, mixture checked full rich, rpm checked at 1,000 rpm. AND you switch off all what is consuming power (the beacon excepted). Hence, as you'll cut off the radios, you'll radio that you'll do that (depending of the terrain: 'Aerospace Ranch, 3-5-Tango, I'm leaving the frequency. Good day' on an uncontrolled terrain. Or, on a larger terrain, you'll ask the clearance to so: 'Cheyenne Ground, 3-5-Tango, at the parking, request clearance to leave the frequency' / '3-5-Tango, Cheyenne Ground. Roger. You're cleared to leave the frequency' / 'Cheyenne Ground, 3-5-Tango, Roger. I'm leaving the frequency. Good day'. You swith the radios OFF now (that's not simulated in FS2002), the possible autopilot, onboard computer OFF too, and the avionics master switch -the white button. All the radios, avionics, etc. are now off. You may procede with the engine cutoff. That's done by leaning completely the mixture, hence stopping the feeding of the engine, which will stop! Throttles full out, a short while and you fully pull the mixture backwards, PROGRESSIVELY. The engine coughs, and stops, with the propeller coming to a halt. Turn off the alternator, the battery, the magnetos keys (from BOTH to OFF, through L and R -with a slight stop at each mark; in the real life, on some planes, one takes the key off the keyhole), the beacon OFF, and, eventually, the fuel selector on OFF. Everything is OK now. Your plane is configured for parking. You can unfasten your own seatbelt, as your possible passengers and yourself may disembark. While the passengers will go to the pilots' lounge and wait there, as you'll meanwhile will finish to completely secure the plane (possible wheels' stops, fixing cables, anti-theft device) or you'll bring it back to the hanger. End of the flight! As far how to count your flight time is concerned, it is computed from the time a aircraft moves under its own power to the time it comes to rest after landing, which may be summarized to when the pilot sits in and when he cuts the engine off. A 'Hobbs meter,' generally, is accurately displaying your flight time, as it allows to to calculate the rental fee of a plane, for example. Such a meter unluckily is not often modelized in FS planes. A pilot notes the meter display when setting into the plane and then once the plane set into its parking configuration. That gives the hour, and/or fraction of hour count to be written down into the pilot's logbook, which usually is done after a flight at the pilot's lounge. For your general knowledge, you will note that times of maintenance, on a other hand, are calculated through a squat switch located on the main landing gear leg, as it activates a hour meter. That runs when it senses that there is no weight on the landing gear. A alternate may also be a hour meter built into the tachometer and working accurately only with the rpm range at cruise power. It reads low when the engine runs slower than cruise rpm
____________________________________
ENGINE CUTOFF AND PARKING CONFIGURATION CHECKLIST

[ ] Pilot's side Door: UNLOCKED
[ ] Pilot's Seatbelt: KEEPING IT FASTENED
[ ] Passengers' side Door(s): UNLOCKED
[ ] Passengers (if any)' Seatbelts: passengers are allowed to unfasten their seatbelts
[ ] Flaps: ALL RETRACTED
[ ] Trim: NEUTRAL
[ ] Parking Brakes: CHECKED PULLED-LOCKED
[ ] Mixture: CHECKED FULL RICH
[ ] Rpm: CHECKED 1,000 rpm
[ ] Radioing: LEAVING THE FREQUENCY
[ ] Radios: CUTTING THEM OFF
[ ] Autopilot (if any): OFF
[ ] Onboard Computer (if any): OFF
[ ] Avionics Main Switch: OFF
[ ] Taxi Lights (in case of a night flight): OFF
[ ] Throttles: FULL OUT
[ ] Mixture: FULL LEAN
[ ] Alternator: OFF
[ ] Battery: OFF
[ ] Magnetos: KEY FROM BOTH to OFF
[ ] Navigation Lights (in case of a night flight): OFF
[ ] Beacon : OFF
[ ] Strobe: OFF
[ ] Fuel Selector: on OFF

supplementary actions to be performed outside the plane (that's not a checklist anymore, strictly): wheels' stops, fixing cables, anti-theft device, etc.)
Well! Your training is over. You really catched now what the real feeling of a GA plane flight is like. Such a way to fly will with no doubt improve your flight experience! As far as to use FS time acceleration, when available, is concerned, it's relatively difficult -above all for a beginner. A accelerated value of x4, for example, already is delicate enough to master. The use of that FS function however is allowing to shrink the time you will dedicated to a flight while you will follow the steps of a real flight aboard a GA plane. GA flights, on the other hand, often are relatively shorts ones, in the order of 1 to 2 hours
Website Manager: G. Guichard, site Lessons In Microsoft Flight Simulator / Leçons de vol pour les Flight Simulator de Microsoft, http://flightlessons.6te.net.htm. Page Editor: G. Guichard. last edited: 5/7/2016. contact us at ggwebsites@outlook.com